
So you’re craving something tasty but too lazy to spend forever in the kitchen, huh? Same. Picture this: you need something that tastes like pure comfort but doesn’t have you standing at the stove for hours, and your kids (or just you) are staring like you’re a magician. Enter How to Make a Good Grilled Cheese Sandwich at Home—the ultimate lazy genius that turns any ordinary evening into pure comfort. One pan, zero stress, and golden, melty perfection that makes the whole house smell like heaven. Let’s get cooking, friend! You’re about to have dinner ready before the reality show even starts.
Why This Recipe is Awesome?
This recipe is a total game-changer, and yeah, I’m saying it: it’s idiot-proof, even I didn’t mess it up. Why? Because it delivers crispy edges, ultra-melty cheese, and that perfect gooey center in one simple skillet—no oven, no waiting. You get big, bold comfort that feels like you slaved all day, but nah, you just spread, toast, and flip. Instant satisfaction that hugs your soul on those long, tired weeknights.
It’s rich, satisfying, and way better than sad gas-station sandwiches. Plus, they freeze like a dream so you can meal-prep for the whole week. Your family (or just you) will think you went all out, but really it’s pure lazy genius with zero judgment. The best part? It warms your home and your heart in one go. Why settle for plain bread when you can have this legendary grilled cheese that makes everyone come back for seconds?
Ingredients You’ll Need
You don’t need a huge shopping list or fancy gear. Here’s what you’ll grab (makes 4 sandwiches, total around 650 calories if you’re tracking, but who’s counting?). Everything is simple and silly, so you won’t overthink it.
- 8 slices white or sourdough bread (fresh from the toaster is chef move—classic soft and fluffy)
- 2 cups shredded sharp cheddar or Gruyère (melty goodness that stretches perfectly)
- 4 tbsp butter (divided—room temperature for easy spreading)
- 1 tsp garlic powder
- 1 tsp onion powder
- 1/2 tsp smoked paprika (optional but adds that smoky pop)
- Salt and pepper, to taste
- Optional toppings: thinly sliced tomato, fresh basil, or a squeeze of hot sauce
Pro tip: Grab everything at once so you’re not hunting for missing bits later. It saves time and keeps you sane.
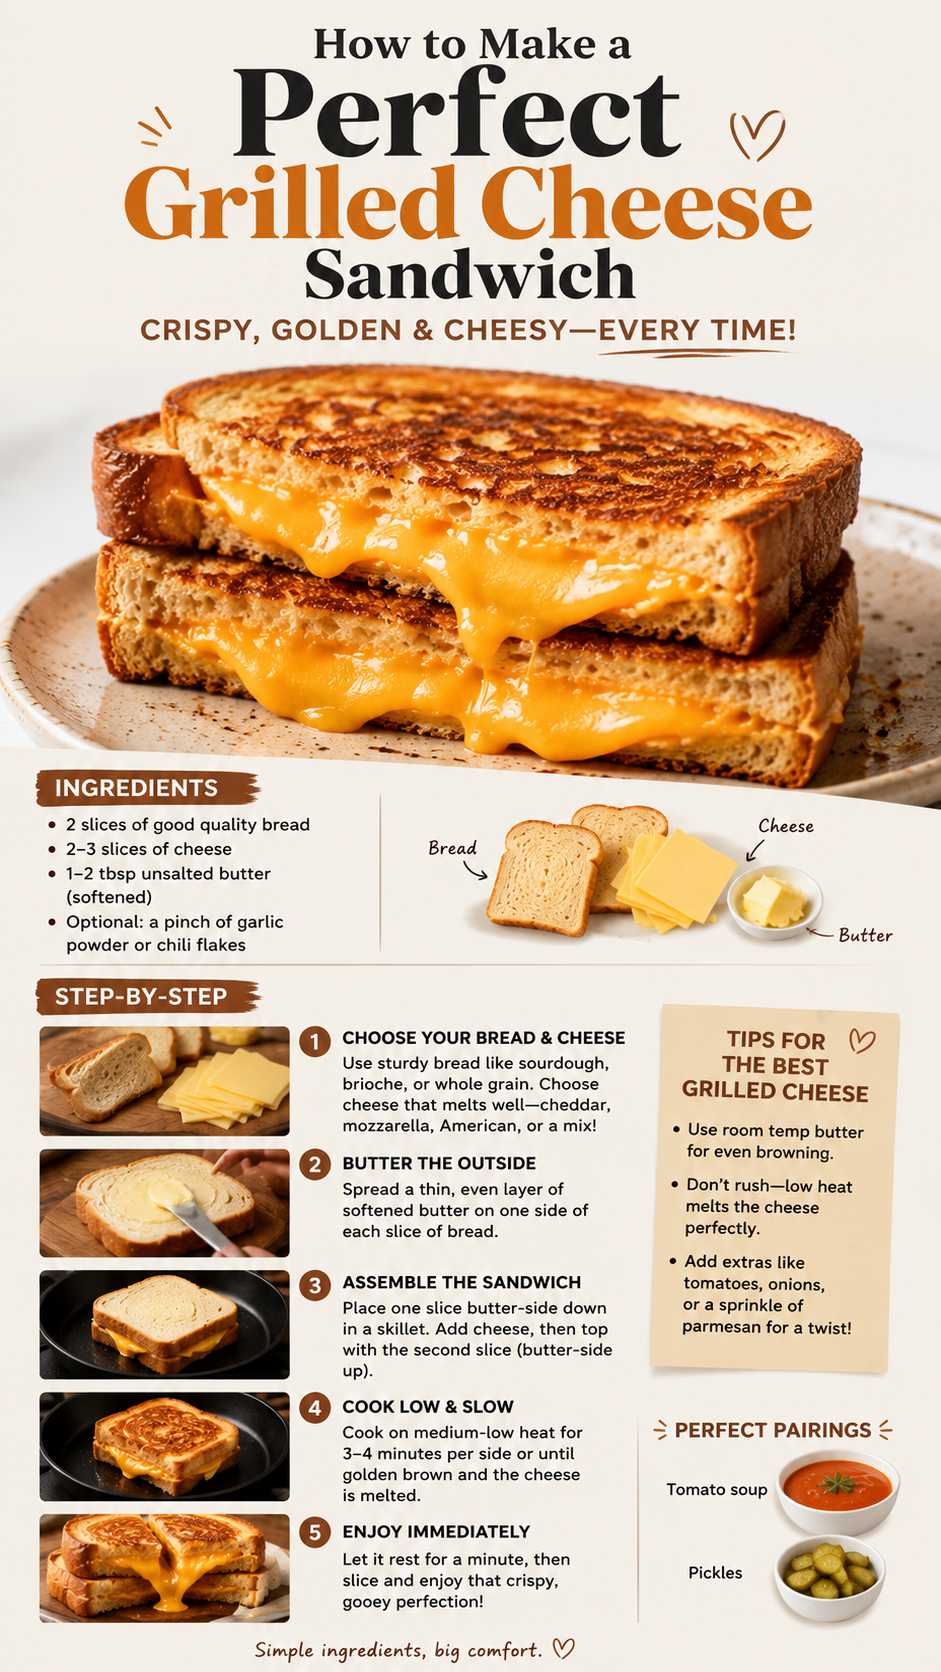
Step-by-Step Instructions
Grab a large nonstick skillet and get ready to cook like a pro. This takes about 15 minutes active time. No stress, just pure fun!
- Mix the seasoning: In a small bowl, combine the butter, garlic powder, onion powder, smoked paprika, salt, and pepper. Mix until smooth. Bold tip: Let the butter soften a minute first so it spreads like butter (pun intended).
- Spread the magic: Spread a generous layer of the seasoned butter on one side of each slice of bread. Layer the shredded cheese evenly on the buttered sides. Don’t skimp—more cheese = more happiness.
- Toast the bottoms: Heat the skillet over medium heat until hot. Place 2 sandwiches, buttered-side down, and cook for 4-5 minutes until the bottoms are golden brown and crispy. Flip gently with a spatula. Pro tip: Don’t move them until they’re properly browned—otherwise they stick and lose that perfect crust.
- Add cheese and finish: Flip and cook the second side for another 3-4 minutes until the cheese is fully melted and gooey. If you want extra crispy, press down lightly with a spatula. Bold tip: For extra gooeyness, add a little extra cheese on the inside before flipping.
- Slice and serve: Let them rest for 1 minute (this keeps the cheese from spilling everywhere). Slice in half if you want and serve hot. That’s it! Dinner’s on the table.
Boom! How to make a good grilled cheese sandwich for the week is done. You’re officially a comfort-food hero.
Common Mistakes to Avoid
Nobody’s perfect, and cooking’s supposed to be fun, not stressful. But let’s skip the rookie traps that turn good sandwiches into blah.
- Using too little butter: Yeah, I see you skimping on the seasoned butter. It leads to sad, dry bread. Always use plenty—your taste buds will thank you.
- Not toasting the bottoms first: Cooking before toasting the outside? No way. Low and slow is what makes them crispy.
- Using cold bread: Straight from the fridge bread = soggy mess. Let it sit out 10 minutes first.
- Skipping the seasoning: “I’ll just use salt” is a lie. The garlic powder and smoked paprika are what make it taste like a restaurant.
- Forgetting to press: Cold toast? Yuck. A quick press gives that perfect bite.
If you hit any of these, it’s no big deal. Just laugh, fix it, and keep going. Cooking’s supposed to be light anyway!
Alternatives & Substitutions
Life happens, and you might not have everything exactly right. No stress—here are swaps that still make these sandwiches shine (with my personal opinions added in for extra flair).
- Cheese swap: Swap cheddar for Swiss or mozzarella. Still melty, but mozzarella keeps it lighter. I love Swiss for that classic nutty flavor!
- Bread swap: Swap white for sourdough or whole-grain. Still delicious, but sourdough gives extra tang. Your call!
- No smoked paprika: Skip it for milder heat or add a dash of hot sauce at the end. Your sandwiches, your rules!
- Tomato swap: Skip tomato for a classic version or add avocado for extra creaminess. Crunchy win, but classic is king.
- No grill: Use a panini press or air fryer. Still works great!
These tweaks keep it simple and fun. You’ve got this—your evenings will never be boring again!
FAQs
Can I make these ahead of time?
Yes! They taste even better the next day. Just let them cool completely, then store in an airtight container in the fridge for up to 3 days. Reheat in a skillet or air fryer for 4-5 minutes to keep them crispy. Perfect for meal prep!
What if I don’t have sharp cheddar?
No problem! Use American cheese or mozzarella. The seasoning and butter still make it pop. American keeps it extra gooey while still feeling like a classic!
Is this gluten-free?
100%. Everything here is naturally gluten-free (just use gluten-free bread). No worries if you’re avoiding wheat—your family won’t even notice.
Can I make them spicy?
Throw in extra cayenne or a spoonful of hot sauce. Just don’t go crazy or it’ll be too much. Start mild and adjust as you go.
How long do leftovers last?
About 3 days in the fridge. After that they’re history. Use them up before they disappear!
Can I freeze this?
Yes! Cool them completely, then wrap tightly and freeze for up to 2 months. Thaw overnight in the fridge and pan-fry fresh. Zero waste!
What toppings go best?
Tomato slices, avocado, or extra hot sauce. They add the perfect crunch and freshness. Don’t skimp on the toppings—they make it next-level!
Final Thoughts
There you have it—How to Make a Good Grilled Cheese Sandwich at Home that turns your evenings into pure comfort wins. You’ve got golden, flavorful, and ridiculously easy right here. Now go impress someone—or yourself—with your new culinary skills. You’ve earned it! If this one becomes a regular, tag me in the comments with pics of your success. Cheers to tasty nights and even tastier friendships.